Jump to Key Sections
ISO image is a special file type that compresses different files and folders into a single one. The most popular usage is for OS and software installation. Sometimes, you have to open the file first to extract content from ISO image. We will share a couple of free ways for doing this. And we focus on Windows 11, the latest Windows operating system Microsoft unveiled on Oct 2021.
One thing to be noted is that ISO is an universe standard and everyone can use its own way to create an ISO image from files and folders. Hence, some of the tool might only support to extract files from specific type of ISO files. We need to switch to another tool when extraction failed.
Windows 11 Stock Mount Feature
The native Mount feature in Windows 11 is one of the simplest ways being used to mount and extract content of an ISO file. However, it might not always be the best option, since you cannot do much with this tool other than extract, mount, and dismount the ISO image.
First, locate the ISO files image in Windows 11 File Explorer. Once found, right click on the ISO image file and click on Mount.

This will mount the image on a new drive and open the ISO file inside the Windows 11 File Explorer. Now you can copy and paste the files and folder you would like to extract from this ISO file onto Windows 11 PC like you would do for any other file stored on your hard drive locally.

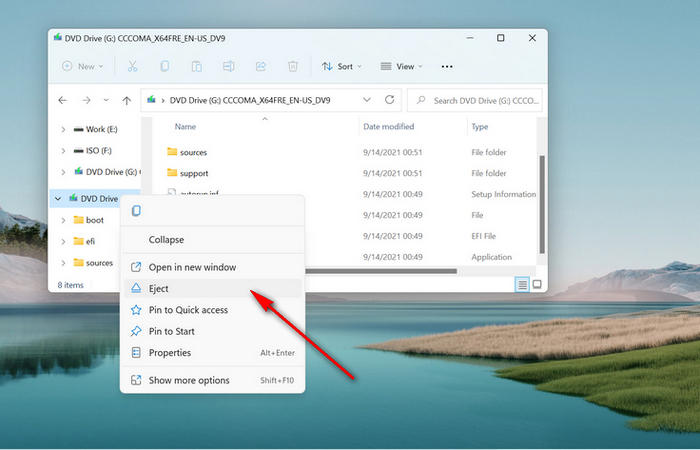
Once done, right click on the newly created drive and click on Eject. This should close the File Explorer automatically, and unmount the ISO image.
Windows Powershell
Windows Powershell is an advanced tool for system administrators. It is upgraded version of default Command Prompt utility. This method is suitable for those who are more accustomed to using Command Line tool in Windows 11, or in other words power users. This involves using cryptic commands on a black screen. If you have not done that before, I would suggest you to stay clear of this method and look at the other 3 methods listed here.
Click on the Windows 11 Start button to search for Powershell. From the result page, locate Windows Powershell icon in the start menu and Run it as administrator.

In the Command Prompt window, first go to the drive where ISO image being located. It is F in my example.
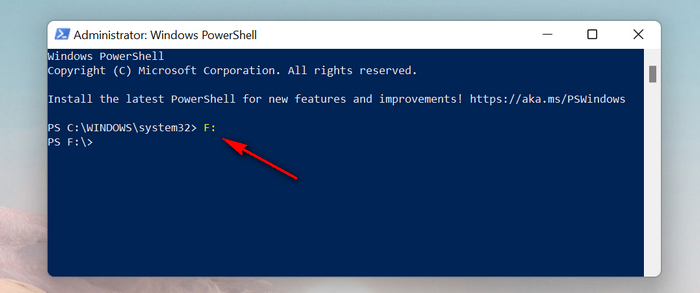
After that, type the below command to mount the ISO file.
Mount-DiskImage
This should ask you to enter the path to the ISO file along with its file name. Enter the same like shown below and press Enter.
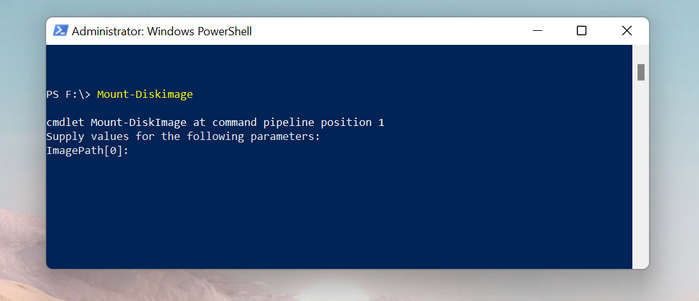
This should mount the ISO file. Note the drive letter and type the following command and hit Enter to head over to that drive. Remember, here F is the drive letter in which the ISO image was mounted, in your case, it might be a different letter. Remember to replace with your respective option.
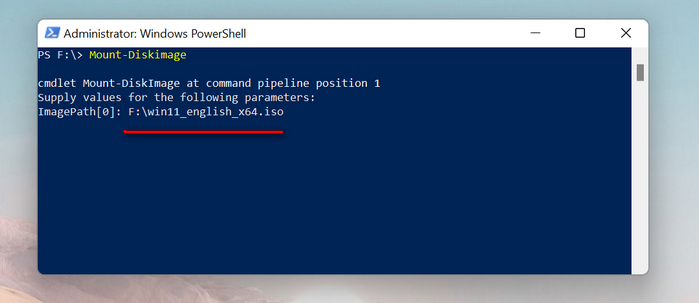
Once the drive is mounted, you will see a new drive name in Windows File Explorer. Now you can copy the files from inside the mounted drive.
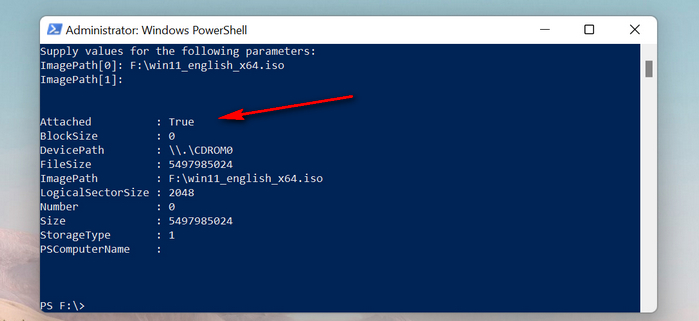
Once you are done, go over to the F drive and apply the below command and press Enter to dismount the ISO image.
Dismount-DiskImage
This will once again ask you for the path and file name of the ISO file. Enter the same details that you had entered earlier, and then press Enter. That should unmount the drive, and you’re done.
UUByte ISO Editor
The stock Mount feature and Windows Powershell does not have the capability to mount and extract content from non-standard ISO files. That’s why third-party ISO tools come into help, such as UUByte ISO Editor and PowerISO.
UUByte ISO Editor is an amazing tool which not only extracts ISO files, but it can also be used to create bootable USB from ISO files, edit these ISO files, and recreate new ISO files using files and folder from you PC. They also have a free version available for download for you to give this utility a spin. This not only runs on most of the major versions of Windows, it is also supported in Mac.
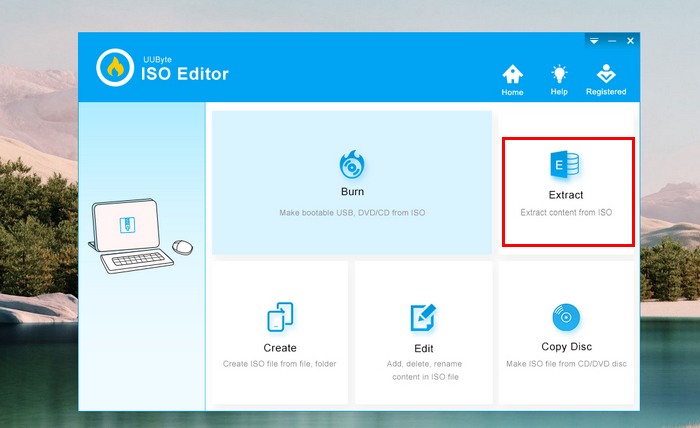
Download UUByte ISO Editor from their website and install the same on your Windows 11 PC. Fire up the utility, and click on the Extract button on the main window.
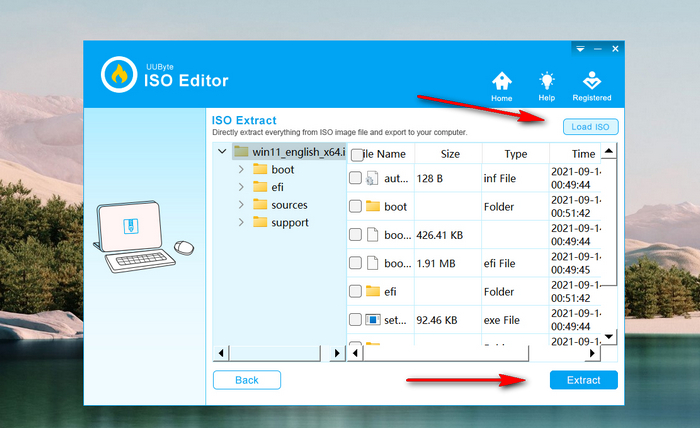
On the next window, click on the Load ISO button located on the top right. This will load all the files and folders inside this ISO file. Select the files and folders that you would like to extract by checking the box beside them. Then click on the Extract button on the lower right corner of the window. Select the folder in your PC where you would like extract these selected files and folder, and they will be extracted there instantly.
PowerISO
This is another utility for Windows that mounts, extracts, nurns ISO files. It also helps in burning audio CD in various formats. PowerISO is also used to convert image file formats between ISO, BIN, etc. It can also be used to create bootable USB, CD, and DVD. It supports both 64-bit and 32-bit versions of Windows.
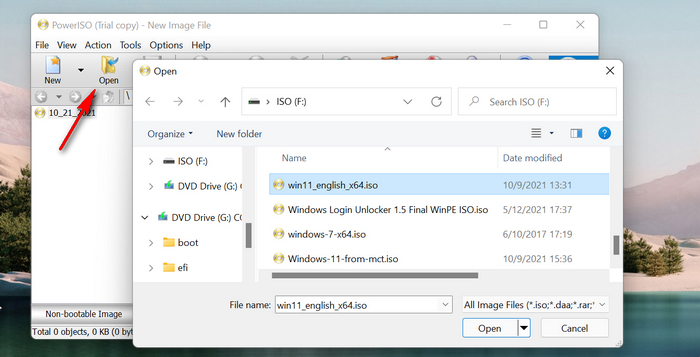
Download, install and fire up PowerISO on your Windows 11 PC from its website. Now, click on the Open button, then browse and select the ISO file that you would like to extract, and click on Open. This will show all the files and folders that constitutes the opened ISO file.
Locate the file or folder that you would like to Extract. If you want to Extract multiple files or folders, you can press and hold the Shift key on your keyboard and select them individually with your mouse. Now, right click on any of the selected files or folders and click on Extract from the menu.
Next, it will ask you to select the folder on your Windows 11 PC where you would like to extract the selected files or folder. Choose the respective folder, check the boxes on this window if you would like to open this folder where you are extracting the files and folders from the ISO file, and if you would like to overwrite existing files. Then finally, click on the OK button.
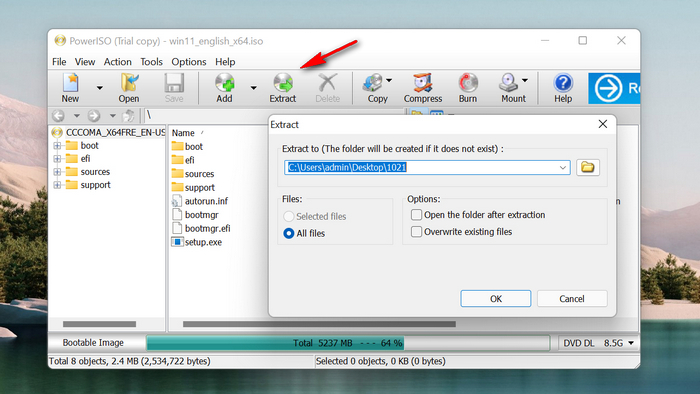
This should extract the files and folders immediately. This is as simple as it gets. The only problem is if you would like to use this same program on a Mac, since PowerISO doesn’t support a Mac unlike UUByte ISO Editor.
Others Apps to Extract Files from ISO on Windows 11
There are dozens of tools available on Windows 11 to let you freely extract content from ISO. However, we could not manage to share all of them in this single post as most of them work similarly. Some other apps worth a mention are:
7-Zip: This is a free and open source tools mainly used for compressing and decompressing .zip file. You may be surprised that it has a default function to open ISO file and extract content from it on Windows 11. It works flawlessly on Windows 11 according to our test. However, it does not have a visual interface and it is a bit complex than other tools.
WinRAR: Another famous file archiver being used widely on Windows PC. It can not only open .rar file but also for .zip and .iso as far as we know. You can assign this app as the default option to open ISO file on Windows 11. After that, you can extract content from ISO with double click. This is very convenience and time saving. However, you have to pay a license for it. If not, it pops up purchase window each time it is opened.
The Bottom Line
Hope this was helpful. If you want my opinion, I would choose UUByte ISO Editor since, as mentioned earlier, you can use it for a whole lot of other purpose than just extracting ISO files in your Windows 11 PC. Right after that, I would choose the native Mount feature in Windows 11.

